ATCart ROS Assemble Set
This ATCart ROS assemble set is pre-assemble and setup for either ROS1 or ROS2.
ROS Assemble Set Hardwares
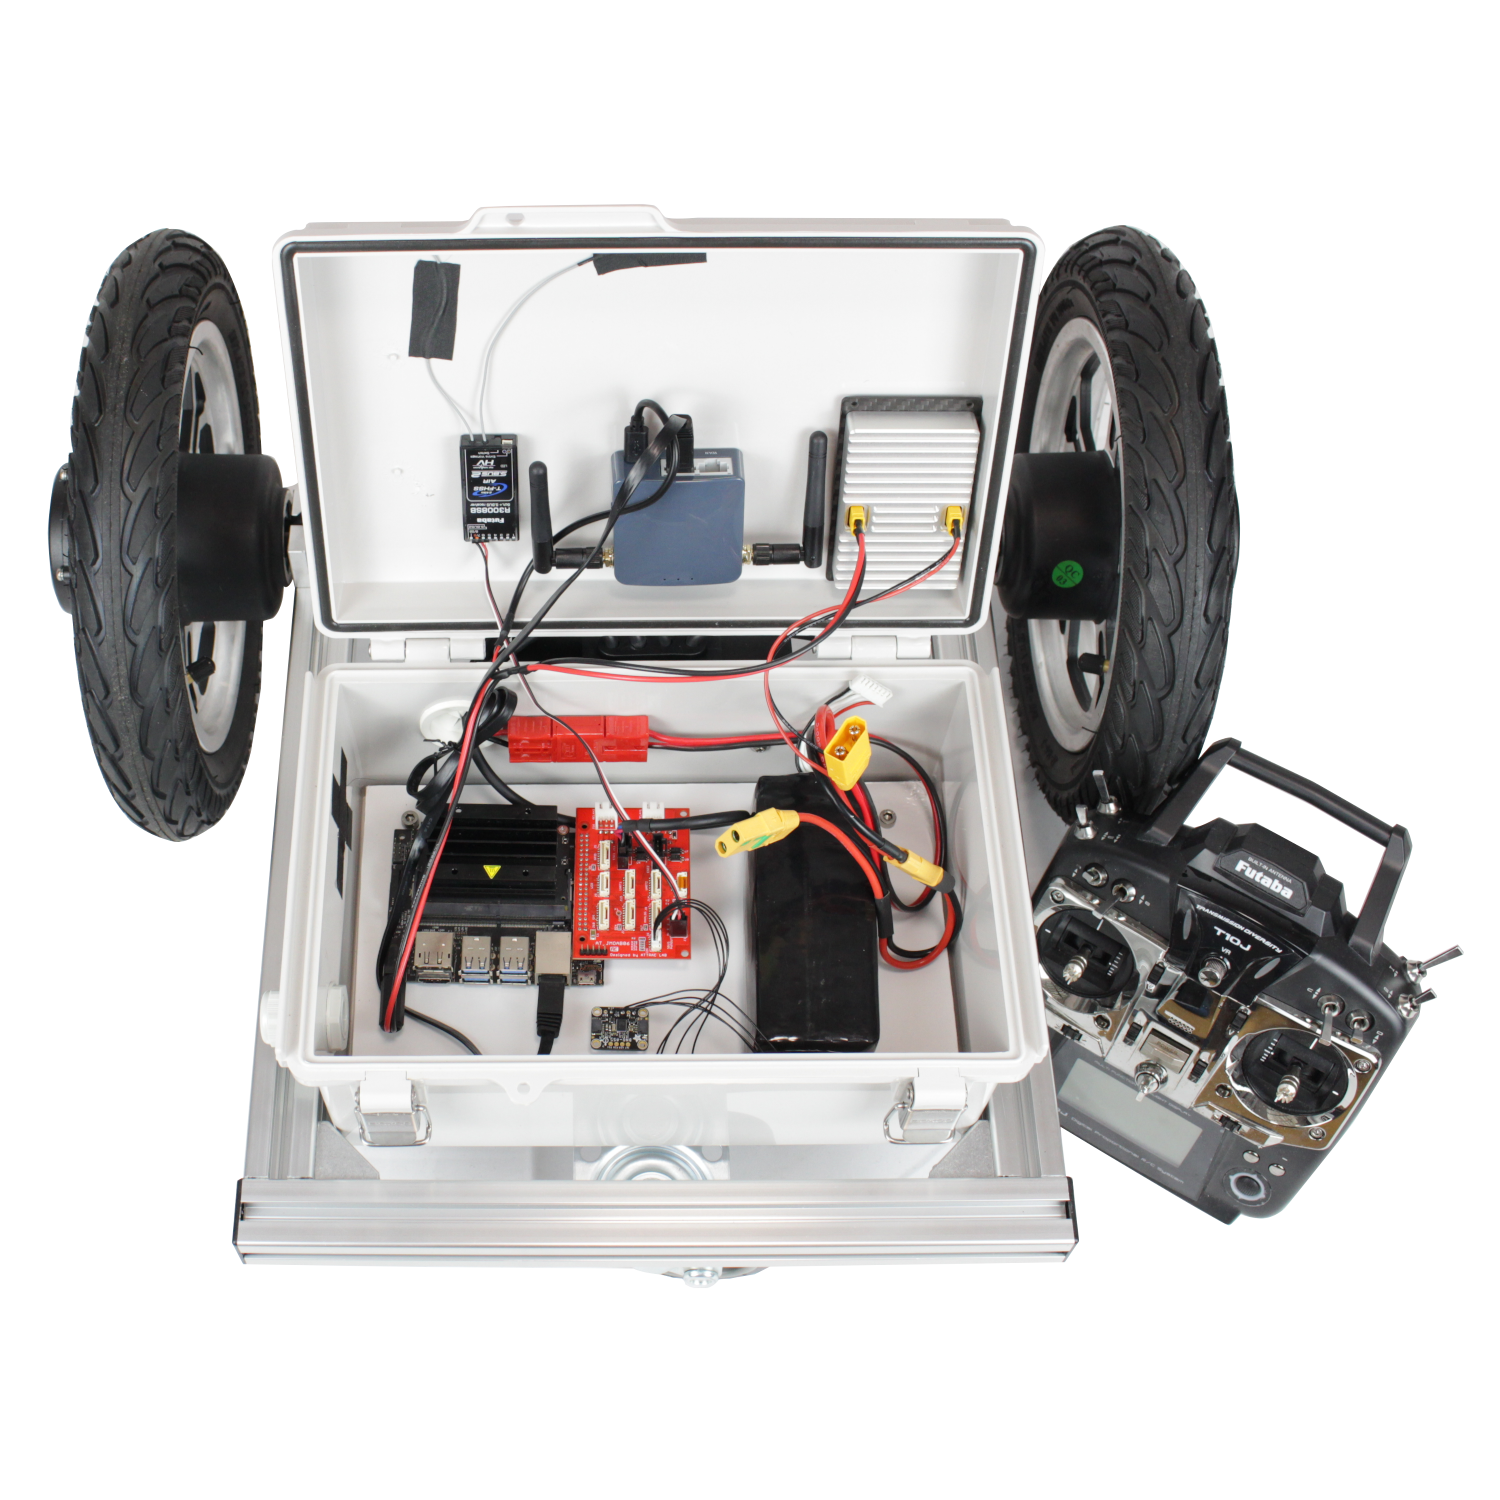
In the pacakge, you could see the following items,
ATCart motors and ESC
Cart frame
Controller box
Jetson Nano
JMOAB
5V DCDC regulator
GL-iNet WiFi router
Futaba radio transmitter & receiver
BNO055 IMU
6 cells LiPo battery
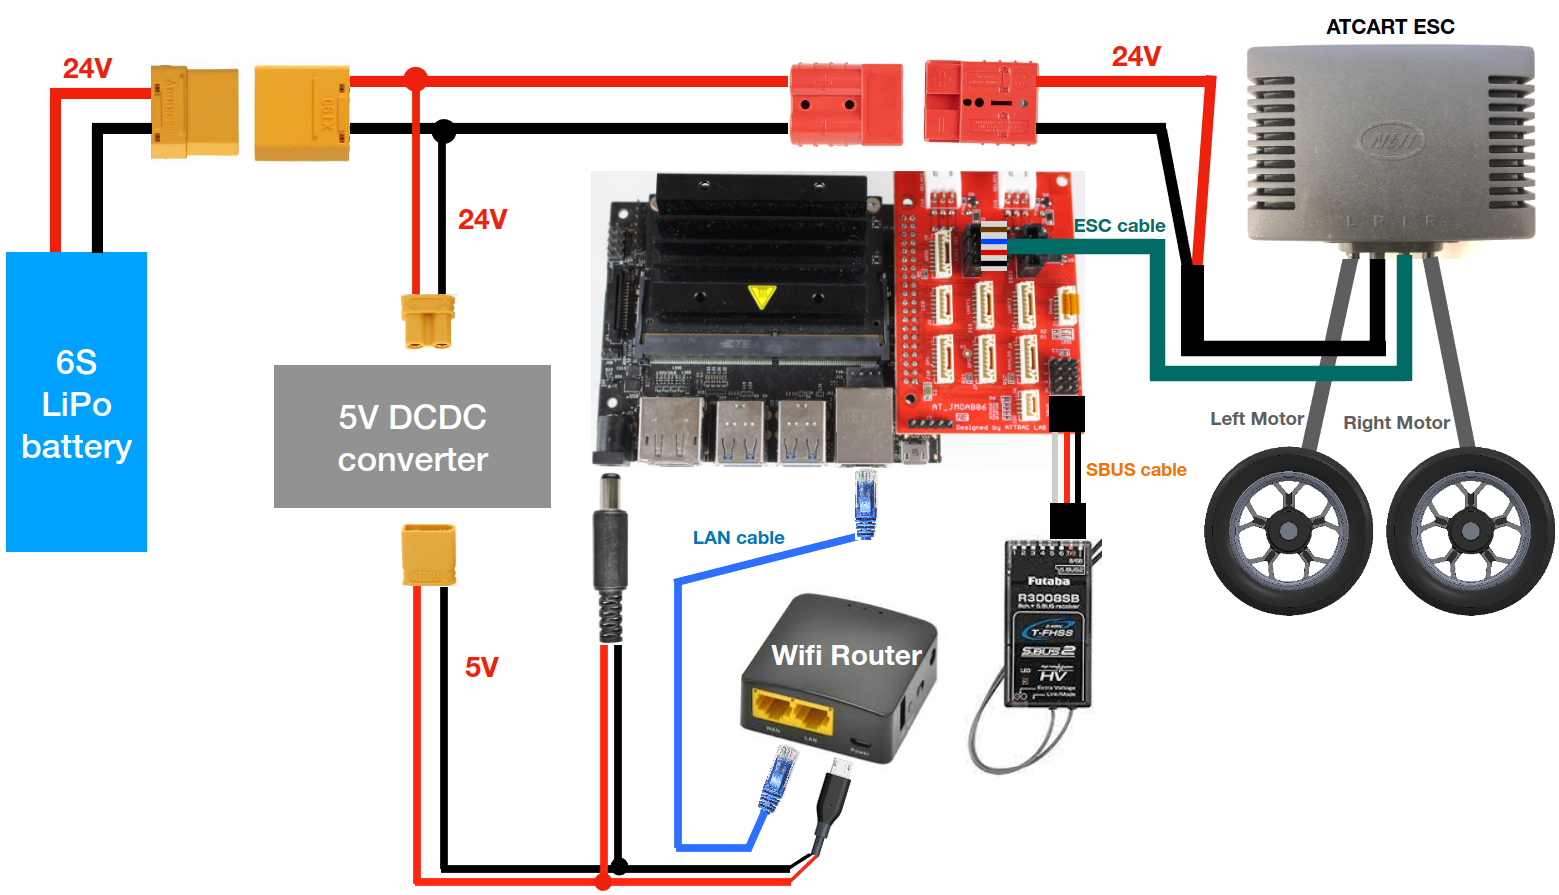
Cable connection
Check And Confirm
Make sure all the connector is plugged on except the battery, after that you could power on the system by plug the battery lastly.
Here is the wiring diagram.
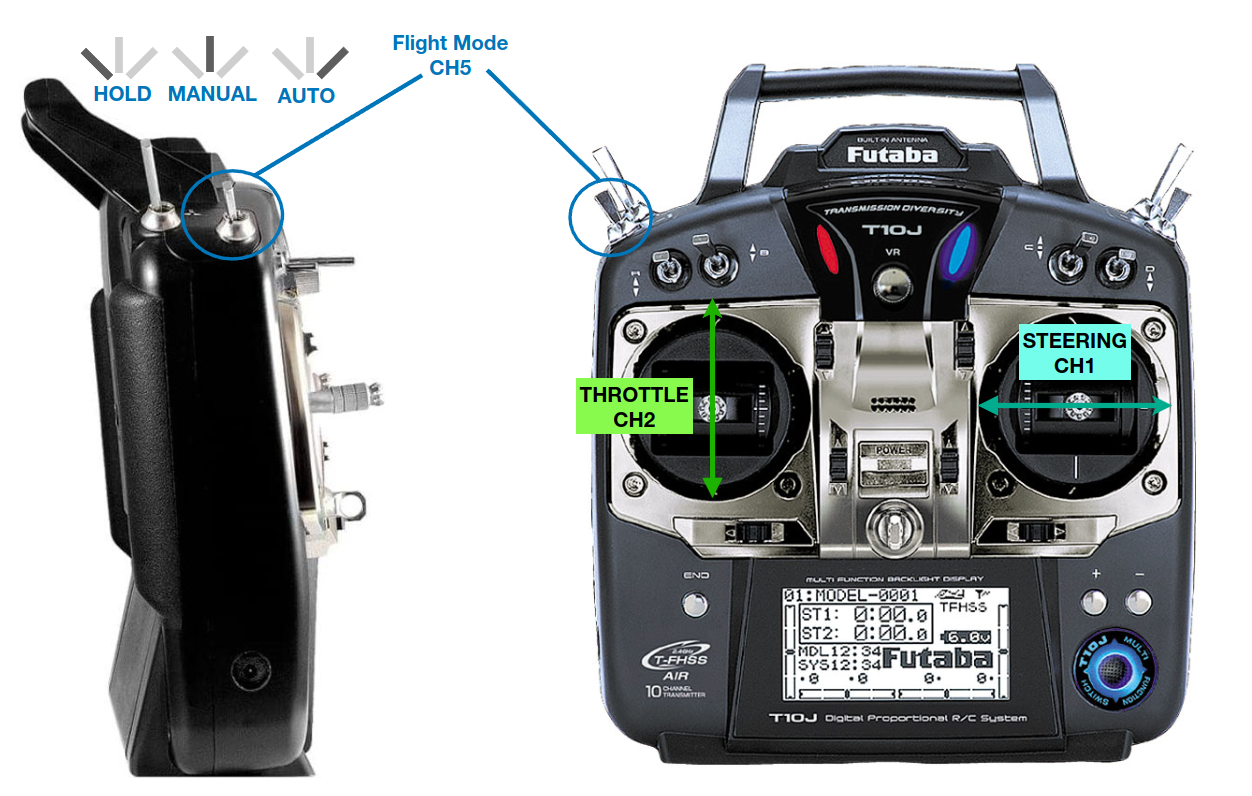
After the robot got powered, then you could turn on Futaba radio transmitter, on Switch E you could change the flight mode to Manual (middle position), and SLOWLY push the left stick up-down to make the cart go forward and backward we call this stick as Throttle. Then try SLOWLY push the right stick left-right to make the cart turning we call this stick as Steering. When the flight mode is in HOLD, both sticks are disabled, and the cart will stop moving. When it’s in AUTO mode, JMOAB will take command from Jetson Nano by running atcart_basic node.
Warning
If you are not familiar with RC controller, the Futaba radio transmitter is a propotional controller, so the more you pushed the faster it is. So please becareful when operating this.
After you have confirmed the movement in Manual mode, then please try to get use to with the robot by driving around make some turning, and stop the cart by switching to HOLD mode.
Next let’s move on to Jetson Nano, we will try to send ROS topic command to control the ATCart.
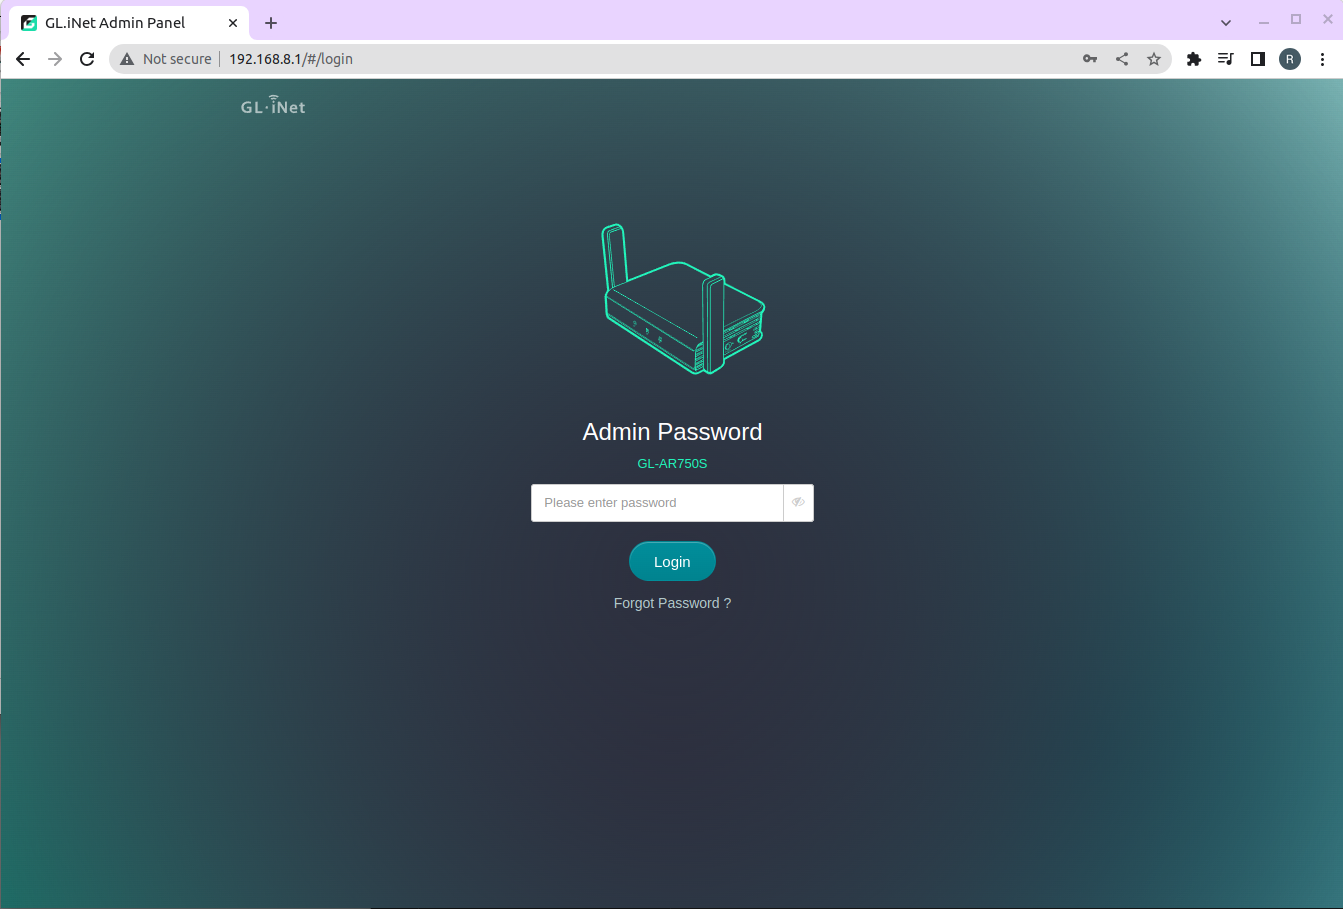
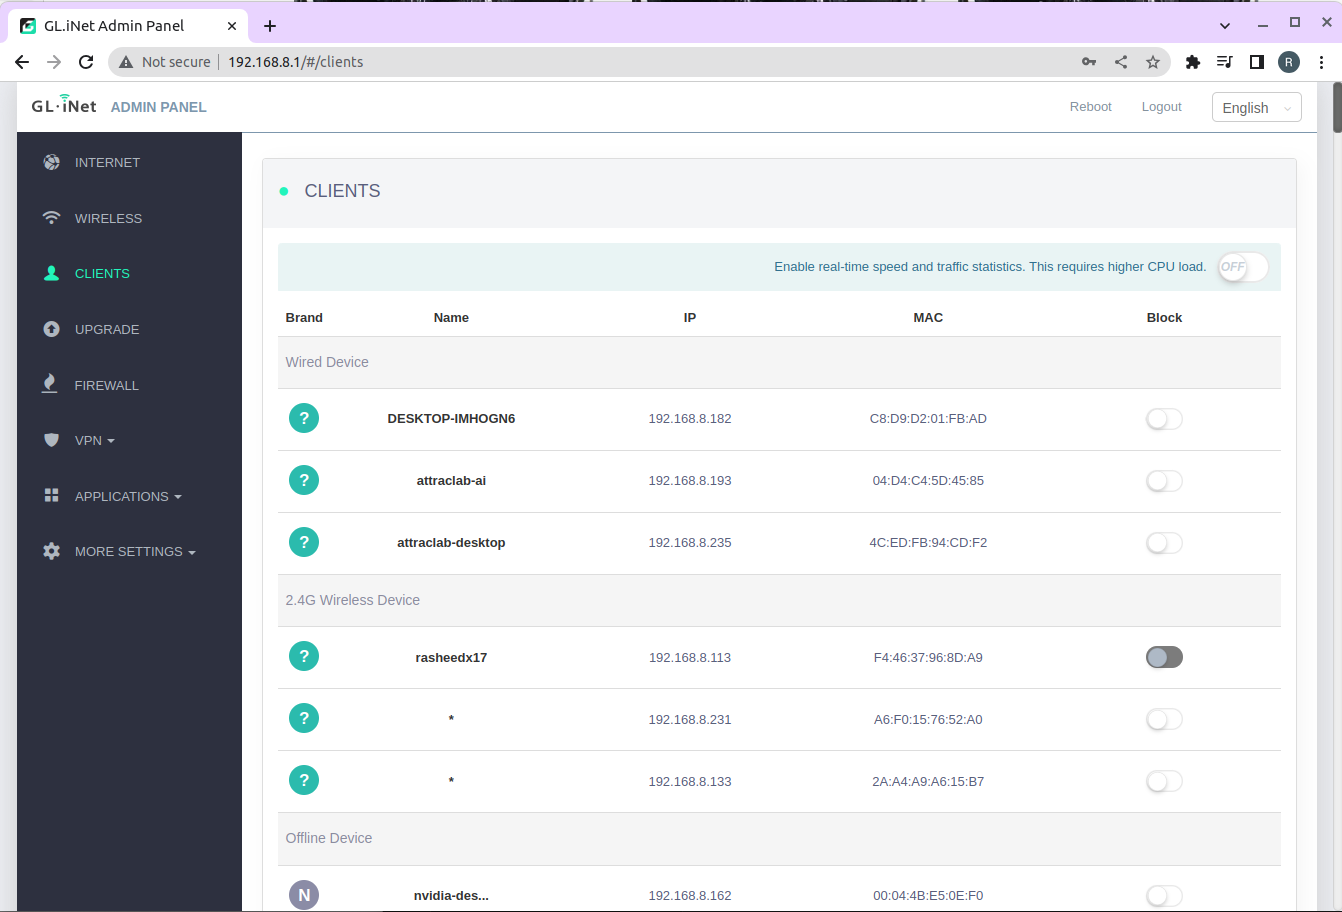
On your computer, you could join the same network of the robot by connecting to GL-iNet wifi. The SSID should start with GL-AR300M or GL-AR750S. The default password is goodlife. Then open the web browser and go to 192.168.8.1 admin page, the admin password is written on the router. Then go to Clients menu to check what is the Jetson Nano IP. You should see at least two devices are connecting, which are Jetson Nano and your computer.
Then you could SSH to the Jetson with that IP. The username and password of Jetson Nano are written on the controller box.
As this command:
ssh <username>@192.168.8.xxx
please replace <username> to the correct username, and xxx to correct IP address.
Drive testing ATCart
Once you’re inside the Jetson Nano, you could try to run ROS node as following.
Note
We are going to send cmd_vel topic to the robot to make it moves, for safety please try find something to lift up the robot, make sure the tires are not touching on ground and make sure it could spin freely in the air.
For original NVIDIA image (Ubuntu18.04)
## Terminal1
roscore

## Terminal2
## start atcart_basic node
## you could see what topic is published or is subcribing from terminal info
rosrun jmoab-ros atcart_basic.py

## Terminal3
## publish cmd_vel topic to atcart_basic
rostopic pub -r 10 /cmd_vel geometry_msgs/Twist "{'linear': {'x': 0.2}, 'angular': {'z': 0.0}}"
Now if we change the flight mode on radio transmitter to AUTO, you could notice that the ATCart’s wheels start spinning. If you try change the value of linear.x or angular.z to see more difference.
Note
If you stop sending /cmd_vel the cart will automatically stop, this is a safety function in atcart_basic node in case the autonomous drive node got crashed during operation.
For custom image (Ubuntu20.04)
## Terminal1
## start atcart_basic node
## you could see what topic is published or is subcribing from terminal info
ros2 run jmoab_ros2 atcart_basic

## Terminal2
## publish cmd_vel topic to atcart_basic
rostopic pub -r 10 /cmd_vel geometry_msgs/Twist "{'linear': {'x': 0.2}, 'angular': {'z': 0.0}}"
Now if we change the flight mode on radio transmitter to AUTO, you could notice that the ATCart’s wheels start spinning. If you try change the value of linear.x or angular.z to see more difference.
Note
If you stop sending /cmd_vel the cart will automatically stop, this is a safety function in atcart_basic node in case the autonomous drive node got crashed during operation.
Warning
The maximum speed linear and angular speeds are estimated to limit to 2.0, so please becareful not to put very big number.
At full speed, the robot could damage things or human surround it, if you don’t pay attention on this. So please operate the robot carefully.
After you have much confident to control the robot, you could try to bring the robot back on ground and try driving it around by cmd_vel again.
As mention earlier, if cmd_vel is not continuously publishing, the atcart_basic would stop the cart immediately to prevent some damage of no control. So you better to make a node that publishing cmd_vel all the time during autonomous operation.
Get IMU Data
The BNO055 board here is already calibrated as default, so you could run the IMU node as it is.
## Terminal1
roscore

## Terminal2
## start the node
rosrun jmoab-ros bno055_ahrs.py
Now you could list the topic, and will see,
/imu/dataas raw sensor_msgs/Imu message/jmoab/ahrsas std_msgs/Float32MultiArray [roll, pitch, yaw] in degrees
You could also notice this node is subscribing on /ublox/fix, /jmoab/sbus_rc_ch, and /jmoab/cart_mode, because when we are using this outdoor with GPS, this node could estimate the correct heading angle by using GPS data when the robot is moving in straight line.
## Terminal1
ros2 run jmoab_ros2 bno055
Now you could list the topic, and will see,
/imu/dataas raw sensor_msgs/Imu message/jmoab/ahrsas std_msgs/Float32MultiArray [roll, pitch, yaw] in degrees
You could also notice this node is subscribing on /fix, /jmoab/sbus_rc_ch, and /jmoab/cart_mode, because when we are using this outdoor with GPS, this node could estimate the correct heading angle by using GPS data when the robot is moving in straight line.
